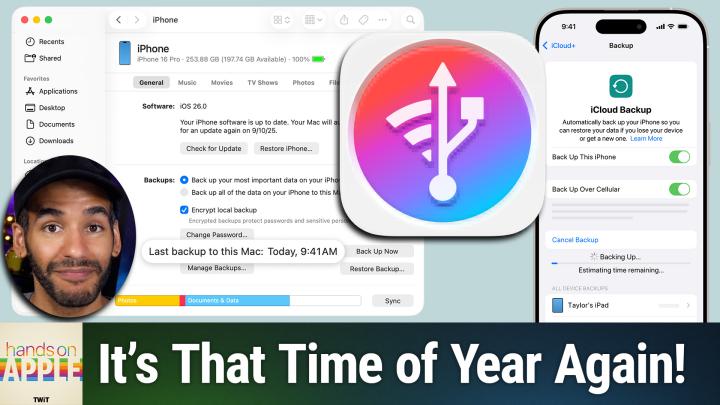
Hands-On Apple 248 Transcript
Please be advised that this transcript is AI-generated and may not be word-for-word. Time codes refer to the approximate times in the ad-free version of the show.
Mikah Sargent [00:00:00]:
All right, open the Settings app on your iPhone right now. Tap your name at the top, tap iCloud, then tap iCloud Backup and look at the date underneath Backup Now. If that date is older than a few days, or if you got a storage warning months ago and swiped it away, well, then your phone has not been backed up in longer than you think. With new iPhones landing in a lot of pockets this month and a major iOS update right behind them, this is the week that matters. Today, we're going through all 5 ways to back up an iPhone or iPad and what each one quietly leaves out. Stay tuned. Podcasts you love. From people you trust.
Mikah Sargent [00:00:46]:
This is TWiT. Welcome back to Hands-On Apple. I am Micah Sargent, and today we are taking a look at backing up your phone. And it starts with the backup that you probably already have. That is iCloud backup. It's automatic, it's invisible, and well, it is kind of very easy to outgrow in terms of what you might need for your device. So let's start with that one by taking a look at iOS. Now, this is very similar on iOS and iPadOS, and where it lives is in the Settings app.
Mikah Sargent [00:01:32]:
So we'll launch the Settings app. You tap your name at the top, just like we talked about at the start of the show, and then we choose iCloud, and we choose iCloud Backup. Now, you'll note that the date here shows the last time this device backed up. That was 2 days ago. On September 6th, 2026, just a little over midnight. If you haven't backed it up, then you can tap Backup Now. This of course also lets you toggle whether you can back up over cellular so that if you have a cellular connection, it will use that to back up your device, or if it's just Wi-Fi, and whether or not you even wanted to back up at all, which is the Backup This iPhone option. Now, here's the thing.
Mikah Sargent [00:02:18]:
3 conditions are required to be true for an automatic backup to run. First and foremost, the device needs to be connected to power, so it needs to be charging. Then it needs to be connected to Wi-Fi or cellular. And lastly, the screen needs to be locked for the automatic backup to take place. If any one of these is not true, Then nothing happens and it doesn't let you know. Wi-Fi is required in most cases. So if you don't have that, if you don't have Wi-Fi access at all, or if your device is not connected to Wi-Fi, or if you have things set up to where it disconnects from Wi-Fi at any period of time, well, then a phone that's living on cellular all week, if you don't have that backup over cellular connectivity option turned on, it's not going to get backed up. And we have to talk about storage because every Apple account that creates an account gets 5 gigabytes of iCloud storage for free.
Mikah Sargent [00:03:24]:
That's not very much, especially with modern devices. iCloud Plus is going to add more. It starts at 99 cents, excuse me, 99 cents a month, and that will get you 50 gigabytes. $2.99 gets you 200 gigabytes, and $9.99 gets you 2 terabytes. And the great thing is that each one of these subscriptions will allow for sharing with family members, sharing with up to 5 family members. Now, an iCloud backup is a little bit different from a full backup, which we're going to talk about soon. With an iCloud backup, let's talk about what's not included. Well, in iCloud, you already have other data there, so there's no reason for the backup itself to include this data.
Mikah Sargent [00:04:10]:
That includes your iCloud Photos library, Your messages, so long as messages in iCloud is turned on, your iCloud Drive files, and your notes. So it's important to understand that synced, which is what each of those categories is doing, is not the same as backed up. So if you delete on one device your notes or your photos or an iCloud Drive file, it's going to delete them everywhere. That is a separate condition from an actual backup. Also, if you have an Apple Watch connected, while your Apple Watch backup kind of rides alongside the iPhone backup, it doesn't live on its own. Getting a new iPhone, and if you, you know, run out of space here, then it is important to go through the process of transferring from one device to the other because the cool thing is— You do get temporary free iCloud storage that exists for 21 days. And even after those 21 days, Apple will give you a free extension. So if you're moving from one iPhone to another and you are trying to back up everything and do this transfer going into— let's go through the process here.
Mikah Sargent [00:05:35]:
We'll launch the Settings app. We'll tap General. We'll tap Transfer or Reset iPhone. And from here, you choose Get Started. And when you do this, it will give you that temporary increase in storage to be able to do it. That's the first way of doing things. Your Mac or your PC can also serve as a place to back up your phone. And what I recommend is doing a local backup because whether you're on Windows or you're on macOS, those backup options to the local drive are pretty much identical.
Mikah Sargent [00:06:24]:
And what's great about it is it's not backing up to the cloud, so no one's counting how many gigabytes of data you're taking up. How do we do it? Well, let's take a look by switching over to macOS. All right, here we are on macOS, and you'll note that we are currently in the Finder app. And when we plug in our iPhone, you may get a prompt on your iPhone that asks if you trust this device. You will choose Trust, and then you will choose to type in your code. At which point it says, okay, you trust this device and you can do it. So connect, allow, type, tap trust, and then in the Finder, you should see your iPhone listed. So up pops this iPhone.
Mikah Sargent [00:07:14]:
I'm choosing to trust it as well on the Mac. It's trusted from the iPhone side of things. It loads up and now we have some options. Once we get this loaded, of course, it is kind of taking a look at the device, understanding what's on it, and getting some basic storage parameters as well. Now, in this, you have 2 options. Back up your most important data on your iPhone— yes, back up your most important data on your iPhone to iCloud, or back up all of the data on your iPhone to this Mac. The second one gives you the ability to take, again, everything that's on this iPhone and back it up to your Mac. On Windows, you use the Apple Devices app from the Microsoft Store.
Mikah Sargent [00:08:07]:
So you need to head into the Microsoft Store and look for Apple Devices if you don't currently have it. And then once you've downloaded the app and opened it up, you'll select the specific device in the toolbar. And then click General and click Backup Now. You don't have to worry about iTunes, so that is not an issue with modern Windows machines and certainly not an issue with modern macOS. Now, once you've done so, if you would like to kind of ditch the cable that comes with your phone as a means of doing these backups, you can actually In the options within Finder, choose Show This iPhone When on Wi-Fi. That will allow for a sort of not temporary, but a blessed connection over wireless between the phone and the Mac so that you don't even need to have it plugged in. Very handy. At that point in this, in your Finder, you will have under Locations that phone show up and you'll be able to do those backups as well.
Mikah Sargent [00:09:16]:
If you're curious where these backups end up, they're in kind of a hidden location. It's within your Home folder. So within Finder, your Home folder is the location that has the Home icon next to it. And then it's in a folder called Library, Application Support, MobileSync, and Backups. And then on Windows, it's stored inside your user folder with the Apple Devices app. If at any point you do the backups directly to your local device, clicking Manage Backups will let you see the backups that you already have, and you can choose to delete them, you can archive them, or you can choose to show them in Finder. Doing so allows you to manage how much storage is being taken up, and if you are regularly backing up to your Mac, go ahead and archive one before installing a beta or a major update. update, Apple's rule is that you can only restore a backup from your current OS version or one that came before it.
Mikah Sargent [00:10:24]:
Now, it's important to understand a local backup only exists on the days that you remember to make one, and it sits on a drive that needs backing up itself. So be mindful of the fact that if you're going to do these local backups instead of backing up to iCloud, you need to make sure that you're doing so later. Now, the most important thing to understand when it comes to doing backups of your iPhone, that is a little checkbox under backups called Encrypt Local Backup. It's off by default, and when you're planning on switching phones or if you're planning on upgrading to a beta, this is a setting that I always suggest toggling on. It's in the same place where you find everything else. And what it does, what only an encrypted backup can do, is it can keep your saved passwords, your Wi-Fi settings, your website history, your health data, your call history. In many cases, it will also save your app login information. So it is a way to put an image of your phone, the phone that you have, onto a new phone without a bunch of extra steps with the setup.
Mikah Sargent [00:11:52]:
That said, it doesn't carry everything. It doesn't have Face ID authentication. It doesn't have Touch ID authentication. It doesn't have your device passcode. All of that never leave the phone that you're on. Which is good. That's a security step. So when you are thinking about going through this process, be mindful of what your restores are, because restoring from an unencrypted backup means you're signing into every single one of your apps again.
Mikah Sargent [00:12:23]:
It means you're retyping every single Wi-Fi password. It means that your health history, if you don't have that saved to iCloud, is starting over at zero. And the password for an encrypted local backup is its own thing. It's not your Apple account password, and Apple is unable to recover this password. So you do need to save this somewhere. I recommend the Passwords app if you use that, or your third-party password manager. Once the box is checked, every backup of that device is encrypted from that point on. And so encrypted is not just a security setting, it's also a convenience setting.
Mikah Sargent [00:13:07]:
You get a much more convenient transfer of your device from one to the other. That said, there is one limit to be mindful of. You can reset the backup password to start making new encrypted backups, but it does not mean that the old ones are unlocked. Those you won't have access to. Those are gone for good because the password that you set is used as part of the encryption. So make sure you save it somewhere. What happens if you'd like to have more than one copy of an encrypted file? Well, that is where a third-party tool like iMazing comes into play. iMazing is a Mac application that lets you back up an iPhone or an iPad.
Mikah Sargent [00:13:58]:
And what is great is that you can pull data back out of those backups. Now, I've talked about iMazing in the past. I believe it was episode number 99 that covered iMazing. There have been some updates since then, but the important thing to understand about iMazing is that it gives you the ability to choose where your backups are stored. And that's important when many of our local devices don't have much more storage than our iPhones themselves. And so I have found it to be an issue where I've wanted to do an encrypted backup, but storing it locally on my Mac meant that it would take up too much storage space. iMazing lets you choose network attached storage or an external drive that's plugged in. And so those are very helpful.
Mikah Sargent [00:14:47]:
And the great thing is that it actually also works over Wi-Fi. So you can set scheduled wireless backups that will run and back up your device regularly. This is particularly handy if you don't want to have iCloud backups. And it works a little differently. iMazing uses something called snapshots. So it keeps multiple points in time so that if you have a bad week, you know, something that you, uh, want to change, it's not going to overwrite the Good Week. And those backups again can live on that external SSD or network attached storage. And the great thing about iMazing is that it's not just a backup tool.
Mikah Sargent [00:15:33]:
It lets you dig into your backups so you can pull out your messages, you can pull out your call history, voicemail, notes, voice memos. You can even adjust the apps on your device. All without wiping the phone by doing a full restore. This is free to try. It does have a subscription if you want to keep using it. I think it's a really great application, well worth trying. Backing up is free for personal use, but it does require a subscription to do restores and certainly to do the iMazing Mini process of keeping those backups in sync. So just be mindful of that.
Mikah Sargent [00:16:21]:
But with Apple's event having taken place and new iPhones on the way, I thought now felt like a good time to make sure that you have your different backup means available. So as I've been doing, I've got some homework for you. Pick up the backup— pick the backup rather that you would actually like to use. And go ahead and get that set up. For most people, honestly, it's iCloud, and that's okay if that's what you use. That's fine. And then head into those settings, tap on your name, tap iCloud, tap iCloud Backup, make sure that the toggle is turned on to automatically do those backups, and then go ahead and tap Backup Now to watch that date change. That's so important.
Mikah Sargent [00:17:10]:
Then if you do have a Mac or a PC in the house, go ahead and do that second one too. Plug it in, Check Encrypt Local Backup, save the password in your Passwords app, let one full local backup finish. Just one, just one. That gives you 2 copies, one that's off your phone and one that's off of Apple servers. Now that said, we didn't get to the kind of second half of this story, which is actually restoring these backups to your device. And each of the options that we talked about today has its own traps that are kind of there. So that's going to be a future episode, restoring from backup. Hey, if you have a backup horror story or perhaps a setup that has saved you that we didn't talk about today on the show, the Club Twit Discord would love to hear about it.
Mikah Sargent [00:18:03]:
So please share your thoughts, your comments, etc. there. And thank you so much for tuning in to this week's episode of Hands On Apple. Bye-bye. Bye-bye.