Hands-On Windows 204 transcript
Please be advised that this transcript is AI-generated and may not be word-for-word. Time codes refer to the approximate times in the ad-free version of the show.
Paul Thurrott [00:00:00]:
Coming up next on Hands on Windows, we're going to take a look at Clipchamp, the video editor in Windows 11. Podcasts you love from people you trust. This is TWIT. Hello everybody, welcome back to Hands on Windows. I'm Paul Thurrott. In the previous episode, I mentioned I was working on a big update to the Windows 11 Field Guide. This has forced me to revisit some topics I haven't looked at in some cases in quite a while. Copilot, which was the last episode, was kind of a happy surprise.
Paul Thurrott [00:00:34]:
Honestly, it's better than I thought it was. So that thing has improved pretty dramatically. But Clipchamp, which we're going to talk about this week, is actually one of my favorite apps in Windows 11, has been for a long time, and it has gotten even better since the last time we talked about it, which I would imagine might be as long ago as 2 years ago, but it's been a while. So what is this thing? So it's a free video editor. It's web-based. It's included with Windows 11. It's also available on the web, and if you use the Windows 11 version now, this is a change, you can only sign in with your Microsoft account. In fact, you have to use a Microsoft account to use this app.
Paul Thurrott [00:01:09]:
If you use the web-based version, you could alternatively sign in with a Google account if you wanted to do that for some reason. The other big change since we last talked about this is that Microsoft has changed how premium features work. So in the past They offered a $12 a month subscription to Clipchamp Premium, which offered things like 4K video as opposed to just 1080p or lower, more stock assets, premium filters and effects, integrated brand kit. You can see over here in the corner here. But now they still offer that, but if you have a Microsoft 365 subscription, meaning a Microsoft 365 Personal, Family, or Premium subscription, you actually get all those premium features as part of your subscription. But the thing is, Clipchamp Premium also offered storage, and it was kind of nice being able to offload all of your assets. So you might have videos, still images, audio files, whatever it might be, to the cloud and not have to have them on your local computer. And you don't have to do this.
Paul Thurrott [00:02:08]:
You can actually just store everything locally on your computer. That works fine. The only issue is if you go to open that project later and you've moved any of those assets or deleted them or whatever, they're not going to show up in Clipchamp obviously, so that could be a problem. And you also don't get that ability to use this project on multiple devices or other PCs or whatever. So by backing up to the cloud, whether you're using Clipchamp Premium or OneDrive, which is part of your Microsoft 365 account, you can, you can use this project and edit this video on any device you have. So it's kind of a nice thing. And I actually really like this because I was paying for both a Microsoft 365 subscription and a Clipchamp Premium subscription. And now we only need— I only need the one.
Paul Thurrott [00:02:52]:
So there are 2 primary interfaces in this app and then several, I'm going to call them secondary interfaces. The first one is this glaring white screen, but this is just the homepage where you get started. They have different ways to start projects, right? So the video with AI option is a multi-step project— process, I should say, where you— AI examines the assets that you bring in and kind of assembles a video for you. You can accept it as is or edit it. I recommend editing it, whatever. These are quick starters for some of those secondary experiences I talked about, and we'll get to that later. Template-based ways to get started, which is kind of nice. And then these, the videos that I've already created.
Paul Thurrott [00:03:32]:
So this goes down back in time for some whatever amount of time. But I will start from scratch. I actually think this is, well, for most people, probably the most common way. You just kind of start with this empty, empty interface. So this is the video editor. This is the other primary interface. Several UI items here. Vertical toolbar with tabs for kind of the project-wide features.
Paul Thurrott [00:03:55]:
We'll go through a lot of this later. You've got this video preview in the middle with a floating toolbar. The options you see here will vary depending on whether any item is selected. There's nothing here, so nothing is selected, but you can use this for selecting different aspect ratios for the video. A background color, which is important if you have different media items that are different aspect ratios. So you might have a 16:9 video but a 4:3 image, and if that image is on top of the video, the video shows through. But if it's on top of nothing, what, what shows through? And so what shows through is what you select here. By default, it is black.
Paul Thurrott [00:04:30]:
Um, actually, the gradient's kind of cool too, but the— but black is the more typical one. And then there's an auto captions feature if you have video that has audio or audio, it will use AI to generate a transcript and then apply captions to the video, which you can edit obviously because there will be mistakes, but really actually a very cool feature. A timeline you can't really see yet, but we'll get to that. And then this over here is another toolbar called the property panel. So this will offer tabs that are context sensitive to an item you're selecting in the timeline. So you will see that In a moment. And then there's a bunch of little things around here. You can rename this.
Paul Thurrott [00:05:09]:
So actually, I didn't— I keep forgetting to do this, but I will do it this time. I'll just call this whatever the name is. And I do have OneDrive. It will harass me to back this up to OneDrive if I don't click it. I think this time— no, I don't want it to spend the time doing it. But you can just have it back up to OneDrive, right? So you can use it on multiple devices. And then these 2 guys over here, so share which— I don't actually see a lot of people sharing a video this way, but this is a way to share the project, I should say. And then when you have a final video or audio, because that's another feature of this app, you can export it right there.
Paul Thurrott [00:05:45]:
All right, so when you start a blank project like the one we have here, Microsoft opens this Import Media or My Media panel, which is from the tab on the side. And this is basically just a prompt to import some media. So I already have some set aside. I will say HEIC, the default still image format on an iPhone, not compatible. So I converted this one to a JPEG earlier just to use as sort of a still image title card or whatever, and then a couple of video files. So you pull those things in, there they are, the timeline appears down here, and you can start dragging things in, or you can try to add some of these other elements. Typically what you would do is bring in some, some clip, whether it's a video clip, an image file, or whatever, And then you get a better view of this timeline. So this thing is not much more than 10 seconds long.
Paul Thurrott [00:06:36]:
If you press play, you can see in here as it goes, you've got this playhead that you can kind of scrub along, etc. This thing is a video clip, and so it is selected. And now 2 things have happened. You've got options over in the property panel on the left, which were not there previously. If I click out, they disappear. And also the floating toolbar changes, right? Because this thing is a media clip and has different options you might want to do. So the aspect ratio of this thing is 16:9, so it's fitting the whole screen. I wouldn't really change anything here, but you can if you'd like, uh, change different things.
Paul Thurrott [00:07:14]:
But I will leave that alone for now. And from here, you know, it says you can add text, you can add audio. Those are the— those positions for text and audio are pretty Pretty standard, but you can also just add other clips, right? So I have a second video clip. I can add it right next to this thing, in which case it would just transition in without a formal transition occurring, but it will just move from one to the other. Kind of a harsh transition, but we'll fix that later. I can also make this just fit the area, which is nice. I could also just kind of move this thing around, right? So you could— I could have 2 or more, any number really, of video channels here. So there's a visual hierarchy here, right? So when you have text, which could be a title, that will be above everything else.
Paul Thurrott [00:07:55]:
This video will be above this video. So as you get— as you scrub along here, you can see it's on the top video, but once it gets to the end, it will transition to the other one because that's what— and I don't know, that wasn't particularly harsh, but there are better ways to do that. But that is one thing you can do. And you can also add a still image, and same rules apply. You could put it above, below, next to, whatever. So in this case, 3 elements: still image, 2 video clips. The visual hierarchy is that if we go back to the beginning, that still image is at the top. It's also the wrong aspect ratio, right? And this is where these floating toolbar commands come in kind of handy.
Paul Thurrott [00:08:37]:
You can crop, you can make it fit. There are these other options I'm not going to fool with, but I would just kind of— I would I would just have it fit because it is a different aspect ratio. You can then just drag this up or down if you want to position this maybe exactly where you want it. And that's not precise, but there you go. And now when we start this video, it will display this image for 4 seconds, I think is the default for images. And then once it gets past that 4-second point, you'll see this. Once it gets past the 10-second point, you go to the third video. So you can hear the audio from the video even though you're looking at still image, right? So that doesn't disappear but it's still available.
Paul Thurrott [00:09:19]:
And then it does that kind of harsh transition. Frankly, I wouldn't normally stack them like this but it is something you can do. All 3 of these elements, all 2 of these types of items support many of the same options. Including fade, which is fade in and out. So for video, like a visual fade in and out. For audio, obviously it would be an audible fade. If I wanted every one of— well, I would want maybe these 2 to fade in in 1 second. You can do 2 at a time like that.
Paul Thurrott [00:09:48]:
This one will eventually be at the end of the video, so I'll do the 1-second fade for that. And so when you go back to the beginning, you'll see the fade-in effect occur right over 1 second. You can change the duration. Obviously, you know, depending on what you have selected, you have filters you can apply, effects, you can adjust colors. I find this to be a little much for most things, but actually the big thing here is the transparency option and then the ability to blend it with what's behind it. It doesn't make sense in this case, but you can see how that video peeks through if I up the transparency. So that might be an effect that's worthwhile in some circumstances. But not this one, right? But okay, I don't— this is not how I would do this myself.
Paul Thurrott [00:10:33]:
I think in this case I might have this as a title card first. I can bump this thing up. If these things— these things will transition. These will too, by the way, but there's going to be a blank space, right? So you can use that Delete This Gap thing to get rid of that. But once these things are next to each other, then you can add a transition, and there are a bunch of them. Over on the toolbar. So 2 ways to do this. One, if you want to use the most common transitions, the one I use pretty exclusively, you can just mouse over that little gap and you can see the Add Transition graphic appear and just apply it.
Paul Thurrott [00:11:07]:
And that applies a crossfade. Once you have the crossfade, you can use the Transition tab on the Property Panel and then make some changes. So for For this thing, really you're talking about duration. Maybe you want this thing to be whatever, 2.5 seconds long instead of 1 second. But you might also want it to be a different transition. You can just change it to one of these other ones, right? I'll just leave it alone, but you'll— you can see the effect of the transition here. So the other thing that happened there is that because this thing doesn't have any sound, it's an image, right? It's silent. And then as the video kicks in, the audio fades in with the video, right? Which is pretty much the right effect.
Paul Thurrott [00:11:51]:
It's, it's what you're typically looking for. So let me close both of these. All right, so now we have— we've got this set of clips. We don't have any additional audio or text. We can do that easily enough. A bunch of text styles. The typical ones for me are under this title area. If you mouse over them, you'll get a preview of what it will do as it it animates in.
Paul Thurrott [00:12:13]:
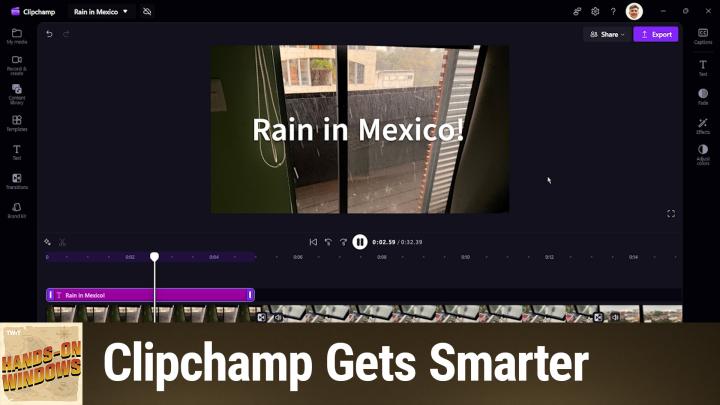
I'll just use the simplest one, which is typewriter. Click that, and I'll put it really close to the beginning because it kind of lines up with that image, right? So we can have this thing appear over the image, and then the image will fade out as the video comes in, as will this element here, right? So we can do the same fade. We can do a fade out. In this case, you want both of those things. We can bring in the text panel here, change this thing. To see the change, you can see the change in the preview window there, but you have to be— the head of the scrubber has to be over that thing or you're not going to see it. So I've selected too many things. All right, so let me bring that back.
Paul Thurrott [00:12:53]:
So now you can see what it's going to look like. And so bring text back. So, you know, maybe you want this to be a bigger font. You probably want it to be something that doesn't say Typewriter. So I can just change it to the Title 8 given the project. That's fine. And other options, I'm not gonna screw around with that too much, but you get the idea there. So now go back to the beginning, preview it again.
Paul Thurrott [00:13:14]:
You can see the animation on the text over the image, no sound, to the video. So let's add some audio though, right? Clipchamp offers this content library. What you see here will depend on whether or not you're paying for it. Honestly, the collection of available assets for free is pretty good, but you get more if you do pay. I am going to look for an audio clip that is tied to rain, right? Because that's the theme here. We have some sound effects that you can preview. It's actually pretty good. And then this probably— yeah, there's no music for this one, but you could have a music option.
Paul Thurrott [00:13:52]:
So I will— I'll just try this guy. Now, that clip that they gave me is much longer than the actual video, right? You can see it stretches past the end. So you can fit that and then you can just drag this thing in so it's the same length. You know, this one already fades out, which is good. This one doesn't fade in or out yet, but it will. So we'll just add that. And actually, I don't want it to be the whole thing, do I? 'Cause then we're gonna have 2 audio clips of rain. So let me see, I think I just deleted that guy.
Paul Thurrott [00:14:22]:
Did I? No, it's super small. That's funny. Yeah, it's way down there. Let me drag you out again. I'll make this thing, if I can ever drag it, it's too small. So I'm gonna make this the same length as the— move that first— the title, which is the text, and also that still image, which is sort of a title card. It's not the greatest title card, but you get the idea. And then you can change the audio volume if you want.
Paul Thurrott [00:14:53]:
I'm not gonna do that, but fade, make sure it's— oh, I didn't fade it. Yeah. So make sure it's 1 second so it matches the other elements there. Okay, so now what we have technically is 5, 4 elements I guess. So text, which is the title, still image, title card, actually it is 5 elements, 2 video clips, and then this audio clip that we got from Clipchamp, right? So close all these things. And then as this starts, the title, the text, still image, and this audio clip are all going to fade in. When they end, these 2 will fade out. This one fades out too because it's part of a transition, so it's the same effect, but you can— these will also fade out.
Paul Thurrott [00:15:38]:
Yeah, so that's fine. I mean, I honestly, I'd probably bump down the volume on that because it's louder than the volume of the video, but you can play with that until it's just right. It's very, you know, kind of get the idea there. So that's, I mean, that's most of the basics. The things you'll see over here in the property panel, like I said, will depend on what is selected. Some of them make more sense than others. I wouldn't add effects or adjust colors to a text title, but I might to an image or a video clip. You can change the speed, etc., you know, from 1x to 1 point whatever x.
Paul Thurrott [00:16:09]:
So that's most of that. So this is most of like what I would call it kind of the the basic video editing experience. When you're done with this thing, you can export it. 1080p is the default. If you were paying, you can go up to 4K, although this will take longer, obviously. You can go smaller if you want, and you can go audio only, which is interesting because we're gonna look at a sub— one of the sub-interfaces or secondary interfaces where you can import audio. One of the things that is kinda less well known about Clipchamp is you can use it for audio editing as well. If you have an audio file or if you just want to do a voiceover for something, you can actually just do it all in Clipchamp even though it's a video editor, and then edit the audio in place and then export it as just audio.
Paul Thurrott [00:16:52]:
There's no reason you can't do that, so that's fine. I'm not going to export this right now, but that's the idea there. And before we leave, I just wanted to go through some of those secondary interfaces because these are really interesting use cases. So the first 4 Are probably semi-obvious just looking at the names, but these are ways to record just the screen like you might in Snipping Tool, just the camera. So you have a webcam on the computer and you're talking into it, maybe narrating something, or the screen and the camera. That's the more interesting of those 3 because you get a— I need to switch cameras here— a picture-in-picture effect. So this is the side camera, not the greatest view, but, you know, choose the audio source, etc. You can have an on-screen transparent script, which is actually very cool.
Paul Thurrott [00:17:38]:
When you click this thing, you choose what you're recording. So I'll do the screen. While it's recording, you're not going to see this picture-in-picture screen, right? So that's weird looking now. Well, actually, now you do see it because we're looking at Clipchamp. But if I minimize that up— because typically what you're recording is not Clipchamp but some other thing— this will be in the recording unless you hide it. So you can hide that. And then you could just use Windows. You do whatever you want.
Paul Thurrott [00:18:03]:
You're making a screen recording, whatever that thing might be. And I can just stop sharing and then go back. And so when you go back, it does a preview of what we've recorded. Now in the preview, you can see my little picture-in-picture thing there. And if it's good, you can save this and edit it. And that will add it to the current project, which I don't want to do for the Rain project, but you get the idea. When you start this thing, you can move that picture-in-picture around. You could resize it.
Paul Thurrott [00:18:28]:
It can be anywhere you want. When it's in Clipchamp, this thing and this thing are 2 different video clips, so you can even within Clipchamp change the positioning. So if you don't like the, the place where this is during the recording, it's no problem, you can just change it later. So very powerful. Let me just exit out of there. And then the audio-only one, and this is the audio version of the video of the camera recording. So you, uh, I only have one mic, so we're selecting— there's no selecting of a mic, but You can, I think it's a 30-minute video. I know video, a 30-minute recording, sorry.
Paul Thurrott [00:18:58]:
30 minutes is definitely the limit for video for each clip. And if you complete that, it would be like those other projects where it just adds it to whatever's there. It might be an empty project, in which case it wouldn't matter, but I don't want to add that to this. And then this one's a little different. You can see it actually adds it directly to the timeline. This uses AI voices, which by the way, very good. I'll just play a preview of this one. Choose from a variety of voices to help you create a— It's loud, but, um, you could type in here.
Paul Thurrott [00:19:29]:
You, you wouldn't— I mean, typically, right? Um, you're going to do this because you— what you're creating is an audio clip, and it's going to be an audio recording of a voice that's AI-generated reading something, basically making a narration. So what you would typically do is have some kind of a text document, a Word document or whatever, that has that script in it, paste it in here, AI will do its thing and then it will add this as an audio clip that you can edit and do whatever you want with just like any other item in the timeline, right? Which is pretty great. I didn't make anything there, so I will kill that. And then we looked at this briefly earlier. I'm going to turn this off. It hates when I do that, but I want to just export this thing. I'll export it as 1080p. This thing is maybe 20 seconds long.
Paul Thurrott [00:20:11]:
I don't remember, but it previews as it exports. This will go quick if it's 4K, not so quick if it's a longer video, not so quick. But once it's done, this is where it gives away the fact that this thing is a web, you know, essentially a web page. It's a web app because this is the same dialog you see in Edge. And I made 2 copies of this video today because, you know, that's what I do. But you can see it here. It's small MP4 format, super compatible. This will work in anything.
Paul Thurrott [00:20:40]:
And then you can preview it one more time. So there you go. So you get the idea. So from here, obviously go back, you can keep editing, you can do whatever you want, move the playhead around, see where different things are, you can add effects. I didn't really go over the filters or effects. I— most of these are a little much in my opinion, but depending on the video, depending on what you're doing, you may want that kind kind of thing. In Effects, I believe it's in Effects, but in one of these 2 there's a green screen effect. So if you have green screen assets where you're going to show whatever's underneath it through the thing, you might have an animated, you know, subscribe to my channel on YouTube kind of thing, it will support that, etc.
Paul Thurrott [00:21:21]:
But I don't know, most of these I don't really like. I don't like what it does. I find myself not using any of them. So there's that. And now that we've done this thing, and I could save it to the cloud, I'm not going to, we can go back to that main screen. It really, really wants me to back up. I'm not going to. And now that video will be down here.
Paul Thurrott [00:21:41]:
So there you go. And then I could access that again. And if I did save it to the cloud, I could access it on any device or computer, which is really cool. So that's pretty much that. I mean, there's more to Clipchamp. Obviously there's a lot more, but this is— those are the basics. Those are the features I think most people are going to use. Hopefully you found this useful.
Paul Thurrott [00:22:00]:
You can You can learn more about the podcast at twit.tv/how. We'll have a new episode every Thursday. Thank you so much for watching. Thank you especially to our Club Twit members. We love you. Love you.